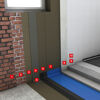
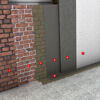
If the damaged cellar wall is not freely accessible due to covering or rebuilding work, subsequent interior water proofing is a real alternative. If the product systems are ideally matched, even high-quality housing can be created in this way.
Excellent reliability for high-quality use
For the purposes of ensuring quality and durability, careful preparation of the surface is essential. The WTA information sheet 4-6-12/D contains extensive advice here. Thanks to the interaction of individual system modules, such as surface pretreatment/strengthening, inner water proofing, horizontal impervious layer and energy-adapted protection systems, it is possible to create high-quality usable housing in old cellars.
1 Preliminary work
Remove older render and coats up to 80 cm above the damage zone and scratch out damaged joints 2 cm deep.
2 Priming
Apply Kiesol (1:1 with water) evenly on the prepared subsurface. Pre-wet heavily absorbent subsurfaces with water.
3 Bonding course
Apply the Kiesol bonding course made of WS Sulfatex with the wide brush within the response time.
4 Equalisation
Equalise all unevenness with WP DS Levell in a wet-on-wet method.
5 Sealing cove
Apply a tight cove with WP DS Levell using a tight cove trowel in a “wet-on -wet” method.


For dry and watertight usable cellars
Time is money! It is therefore worthwhile opting for fast solutions for cellar rooms used as cellars. Solutions that do not aim for maximum (living) comfort but efficient completion times. The Remmers repellent mortar delivers this solution. In cellars that are purely used as cellars, the product can be used in combination with the capillary filler iQ-Top SLS alternatively to the classic Kiesol system comprising grouts and high-performance restoration render.
Application examples
- A system solely for usable rooms with normal moisture levels because moisture sorption through a capillary-active filler is only reliably possible at low temperatures or vapour pressure gradients
- Store rooms, stock rooms, garages, bicycle cellars
Properties
- Fibre-reinforced water-permeable render
- Tested up to 2.5 bar (this corresponds to a 25 m water column!)
- Considerably higher speed because denseness and equalisation through one product
Advantages
- Special system for basements
- Efficient model thanks to less and simple work steps
- Equalisation and sealing only with repellent mortar
1 Surface treatment
Remove older render and coats up to 80 cm above the damage zone and scratch out damaged joints 2 cm deep.
2 Priming
Apply Kiesol (1:1 with water) evenly. Pre-wet heavily absorbent subsurfaces with water.
3 Bonding course
Apply the Kiesol bonding course made of WS Sulfatex with the wide brush within the response time.
4 Sealing cove
Apply WP Top [basic] with a tight cove trowel “wet-on -wet” in the transition area between the wall/floor.
5 Equalisation
Equalise all unevenness with WP Top [basic] in a wet-on-wet method.
6 Sealing layer
Apply a water proofing layer of approx. 20 mm made of WP Top [basic] in the roughened equalisation. Roughen the adequately stiffened surface to improve the grip of the subsequent filler.
7 Surface finish
Apply a layer of iQ-Top SLS of approx. 5 mm after 2 – 7 days.

Basement waterproofing
3 products foundView:
Article No. 043025
Rigid mineral waterproofing grout with high resistance to sulphate


